User Guide
Main menu screen
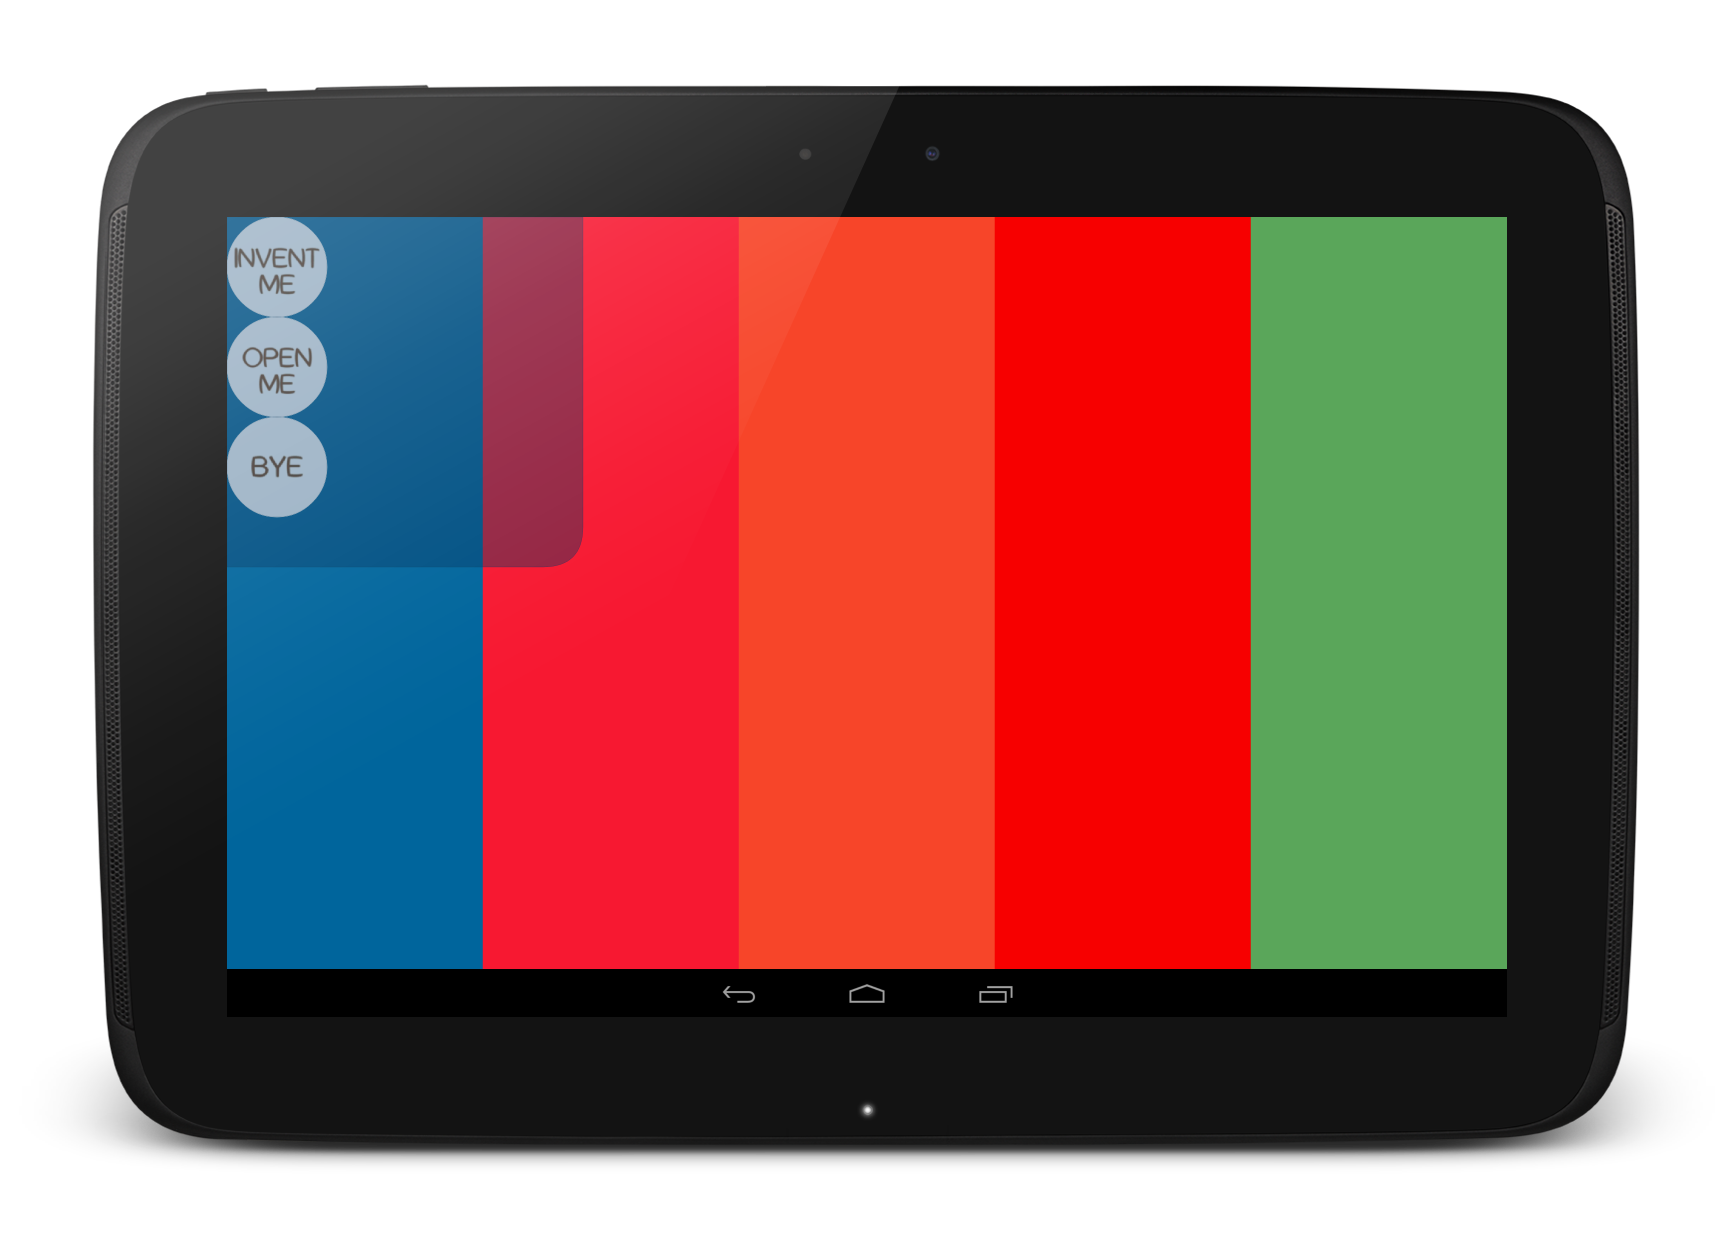
The main menu screen presents you with three options:
Invent me. With this button, Inventame suggests you to invent it. By pressing the button you go to the invention screen where you can create a new game.
Open me. Press this button if you want to open an already created game. For selecting the game you will be presented with the standard Android gallery (since a game, in Inventame, is actually a picture). Navigate through the gallery and select the picture/game you wan to play. Then you will be taken to the play screen to play the selected game.
When you open a picture/game you are presented with a message asking you to wait while the picture is processed. Once the picture is processed, you are redirected to the play screen to play the just open game.
Note that Inventame will allow you to open even pictures that have not been used to create a game. In that case, a ball will appear in the center of the image, and the values of all the game options will be the default ones.
Bye. By pressing this button you will exit the App.
Invention screen
This is the screen where you can invent a new game. Since you need a picture in order to create a game, there are only three options available when you just enter the invention screen:

Folder icon. Open a picture by using the standard Android gallery. When you open a picture you are presented with a message asking you to wait while the picture is processed.
Camera icon. By pressing this button, you are taken to the camera screen (see below) where you can simply take a new picture.
Main menu. Go back to the main menu screen.
In addition, you can go back to the main menu screen by pressing the standard Android back button.
Once a picture is loaded (whether you have picked it from your gallery or you have just taken it with the camera), you have all the options available:

The buttons “Folder”, “Camera” and “Main menu” work as just described above. Next we provide a description of the other buttons.
Type of visualization

- Original picture. By selecting this option, the original picture is displayed as the game scenario.
- Control picture. By using this option, the picture/scenario is displayed as recognized by Inventame. This is especially useful when taking new pictures of the crafted scenario. It helps you to check whether the scenario is recognised as you expected.
Type of interaction

There are several different interactive mechanisms available to move the interactive objects in your games. You can select the one you prefer for each concrete game/scenario.
- Tilt. Tilt the device so that the interactive objects fall as if gravity would affect it.
- Push. Tap, hold and pull forward to throw the object.
- Slingshot. Tap, hold and pull back to slingshot the object.
- Follow the finger. Tap an object and then move your finger or tap anywhere else on the screen. As a result, the ball starts moving towards the finger location.
- Direct location. Tap the object, hold and directly slide your finger on the screen towards the location where you want to locate the object. This option is especially useful when, in the middle of a game, you want to change the location of one or several interactive objects.
- Invert axis. This option is only applicable to the “tilt” kind of interaction. By inverting axis, tilting the device horizontally produces a vertical movement of the interactive objects, while tilting the device vertically produces a horizontal movement of the objects. These movements are counterintuitive and therefore you can use them to produce trickier game experiences.
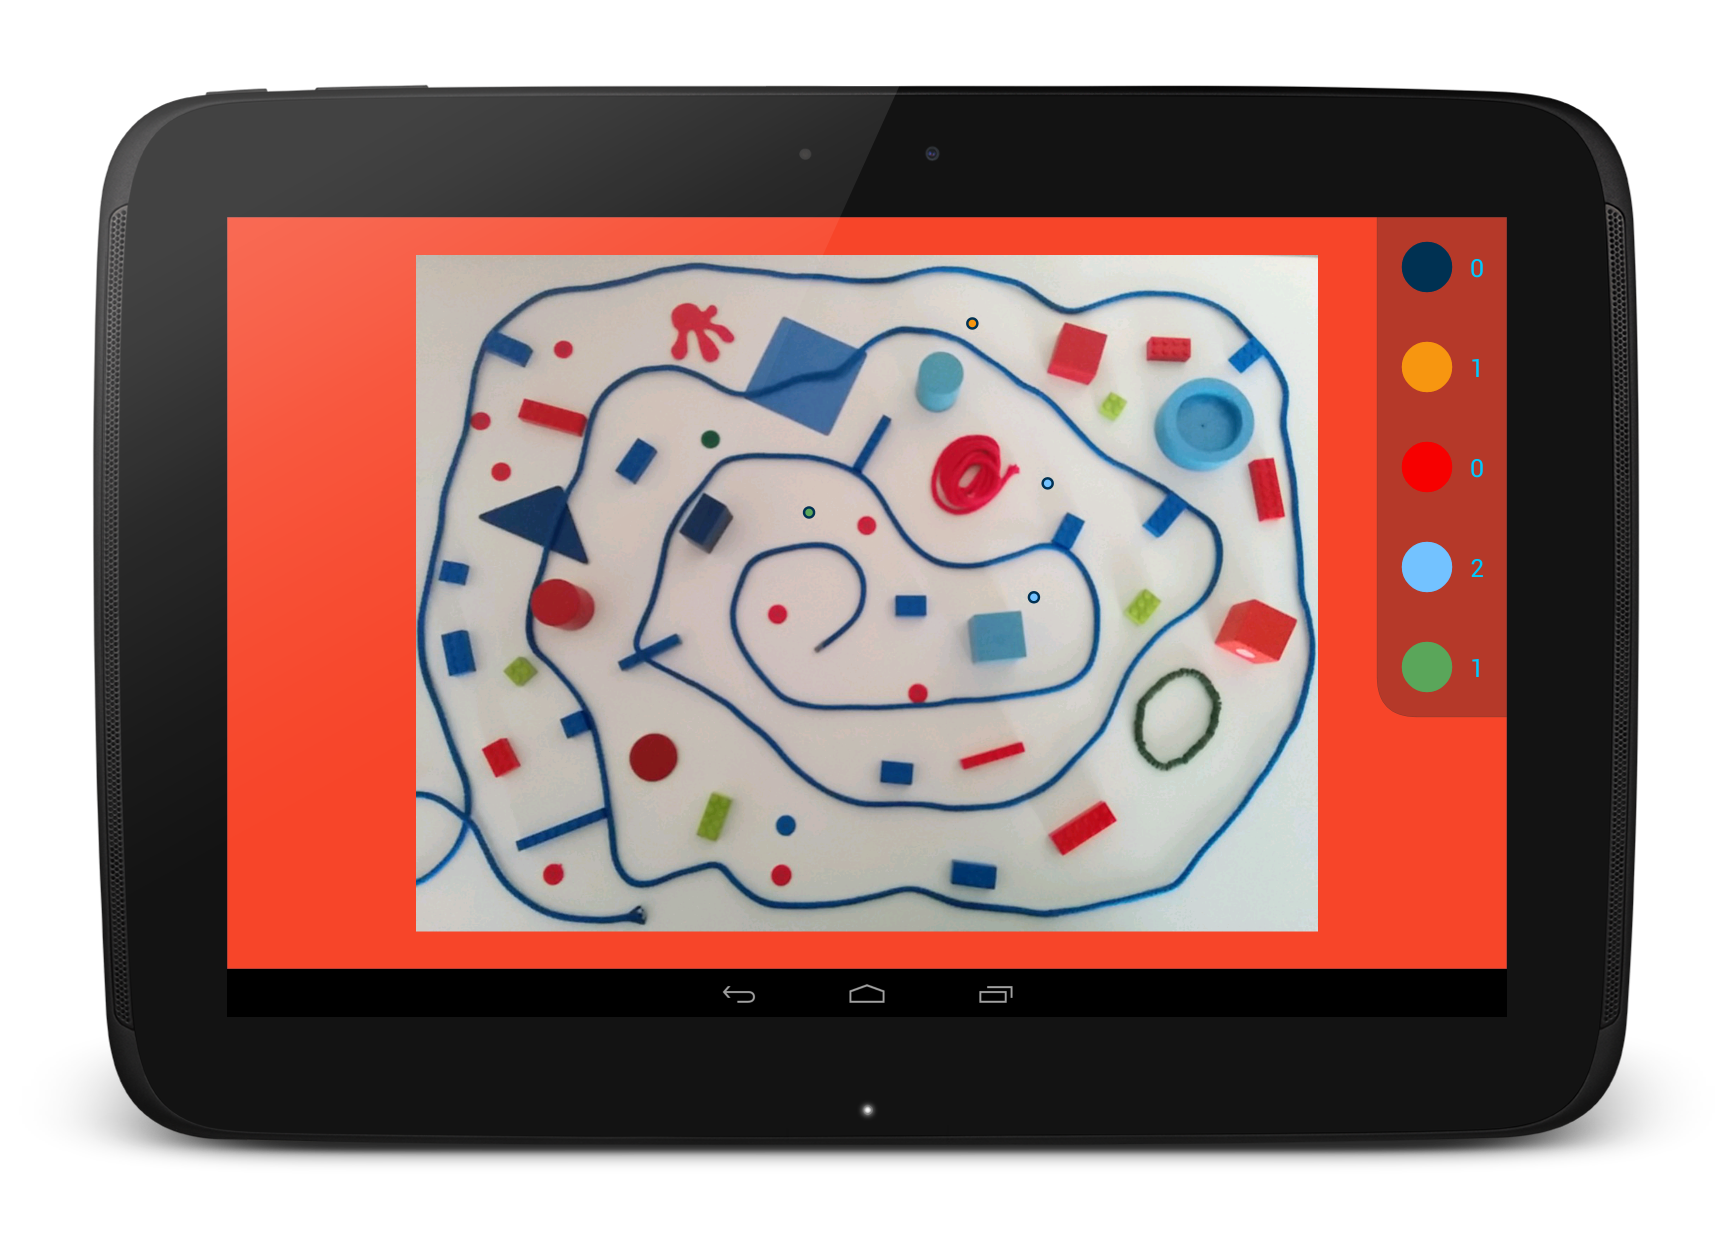
Behavior of the red, green and blue colors in the scenario

Inventame recognises a number of colours (red, green and blue) in the picture/scenario. For each of the three recognisable colours (red, green, blue), you decide what happens when an interactive object reaches a zone of the picture/scenario that is on that colour. You can choose among these options:
- The coloured zone behaves as a solid element, that is, the interactive object collides with that zone. It is adequate for elements that the interactive objects cannot pass through (wall, floor, etc).
- The colour of the zone changes to a grey colour.
- The colour of the zone changes to a pink colour.
- The object passes over the zone without causing any effect to it.
For each color (red, green, blue), press its related arrow button to iterate through the available behaviors.
By default, the roles are initially assigned in this way:
- Red. The color of a red zone changes to a grey colour when it is reached by an interactive object.
- Green. The color of a green zone changes to a pink colour when it is reached by an interactive object.
- Blue. Blue zones behave as solid elements, that is, the interactive objects collide with those zones.
Interactive objects

By pressing the bottom button you are redirected to the interactive objects screen where you can add/remove interactive objects to/from your game.
The numbers beside the colored circles indicate the number of interactive objects of each color in the game.
Save. By pressing this button, you save the game. Note that when you take a picture, the picture is stored in your device (in the folder Inventame). However, the information about the game (type of interaction, behaviors of colors, interactive objects, etc) is not saved unless you explicitly press this button. Note also that this game information is saved in the picture file itself.
Play. Go to the play screen to play the game with the options currently selected in the invention screen.
Camera screen
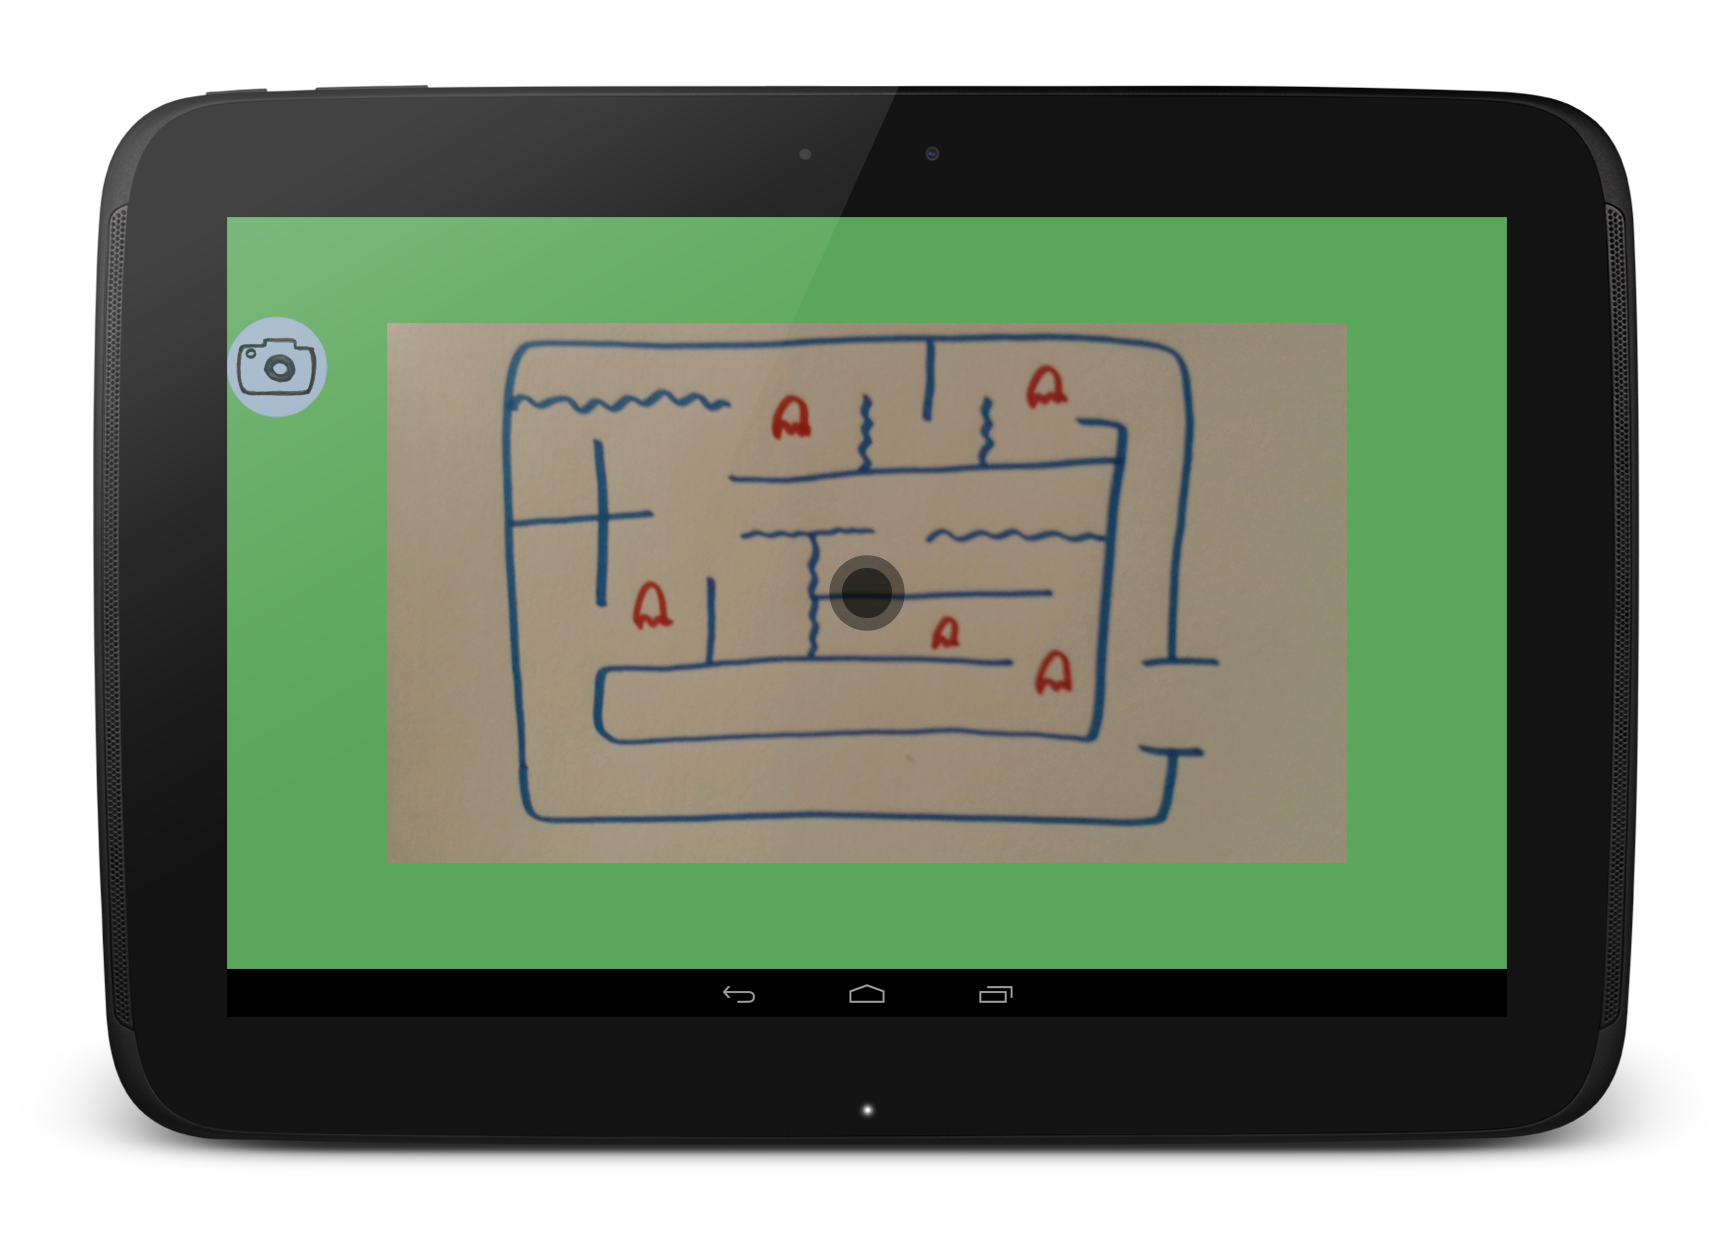
To take a picture, just press the camera icon. The pictures will be automatically saved in an Inventame folder.
When you take the picture you are presented with a message asking you to wait while the picture is processed. Once the picture is processed you are taken back to the invention screen.
In addition, you can go back to the invention screen without taking any picture by pressing the standard Android back button.
Interactive objects screen
In this screen, you can add/remove interactive objects to/from your game. The location where you add an interactive object will be its initial location (the location where the object appears when the game starts).
As you can see at the right side of the screen, there are five different colors of interactive objects. Thus, you can differentiate between different kinds of objects (for instance, different teams).
To add an interactive object on a particular color, just tap the circle on that color (at the right side of the screen) and move it to its desired initial location on the picture/scenario. If you try to locate it outside the picture/scenario, the object will not be added. The object won’t be either added if you try to locate it on a zone of the picture/scenario on a color with an active behavior.
To remove an interactive object, just tap it and move it anywhere outside the picture/scenario.
Note that the numbers beside the colored circles (at the right side of the screen) indicate the current number of interactive objects on each color.
You can go back to the invention screen by pressing the standard Android back button.
Play screen
This is the screen where you actually play the game.
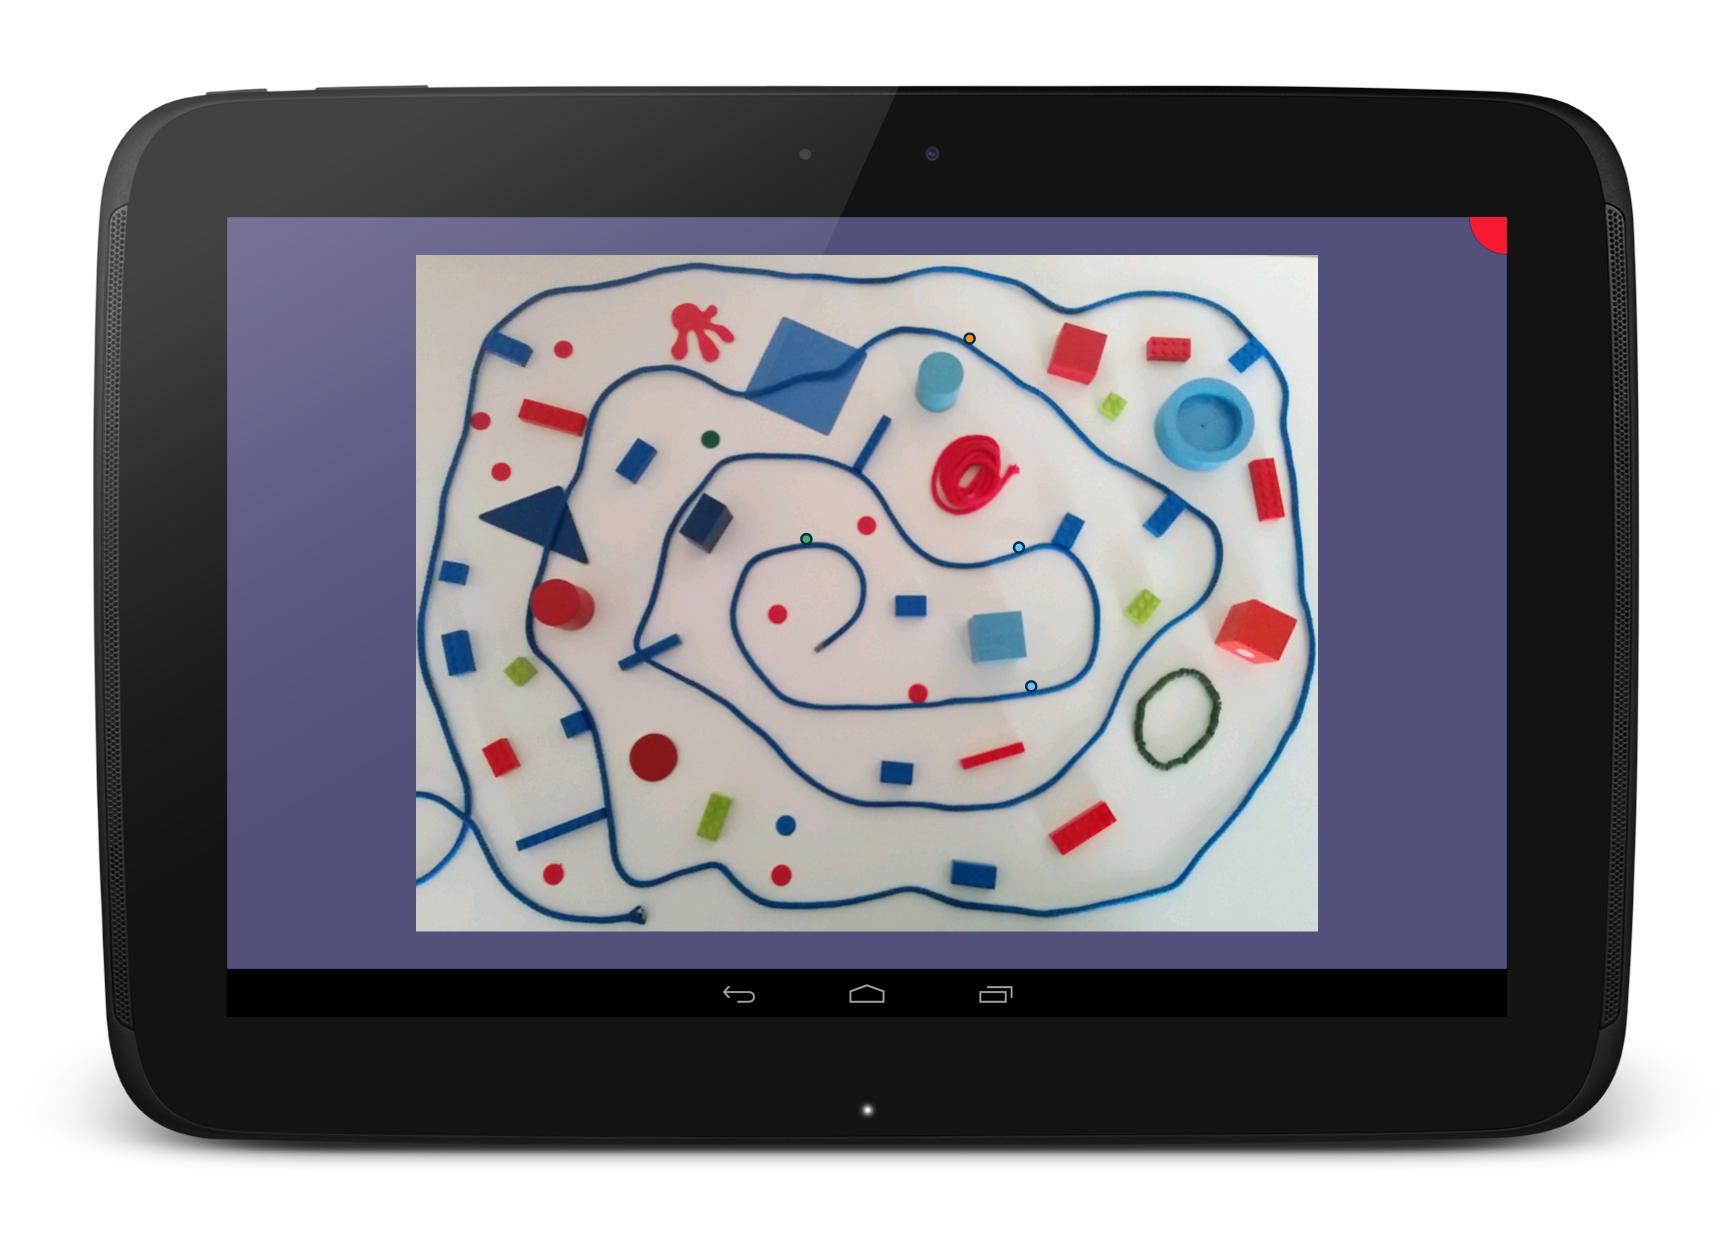
By pressing the red circle at the top right corner, the game is temporarily paused while you are redirected to the runtime menu screen where you can change some game options.
In addition, you can go back to the main menu screen by pressing the standard Android back button.
Runtime menu screen
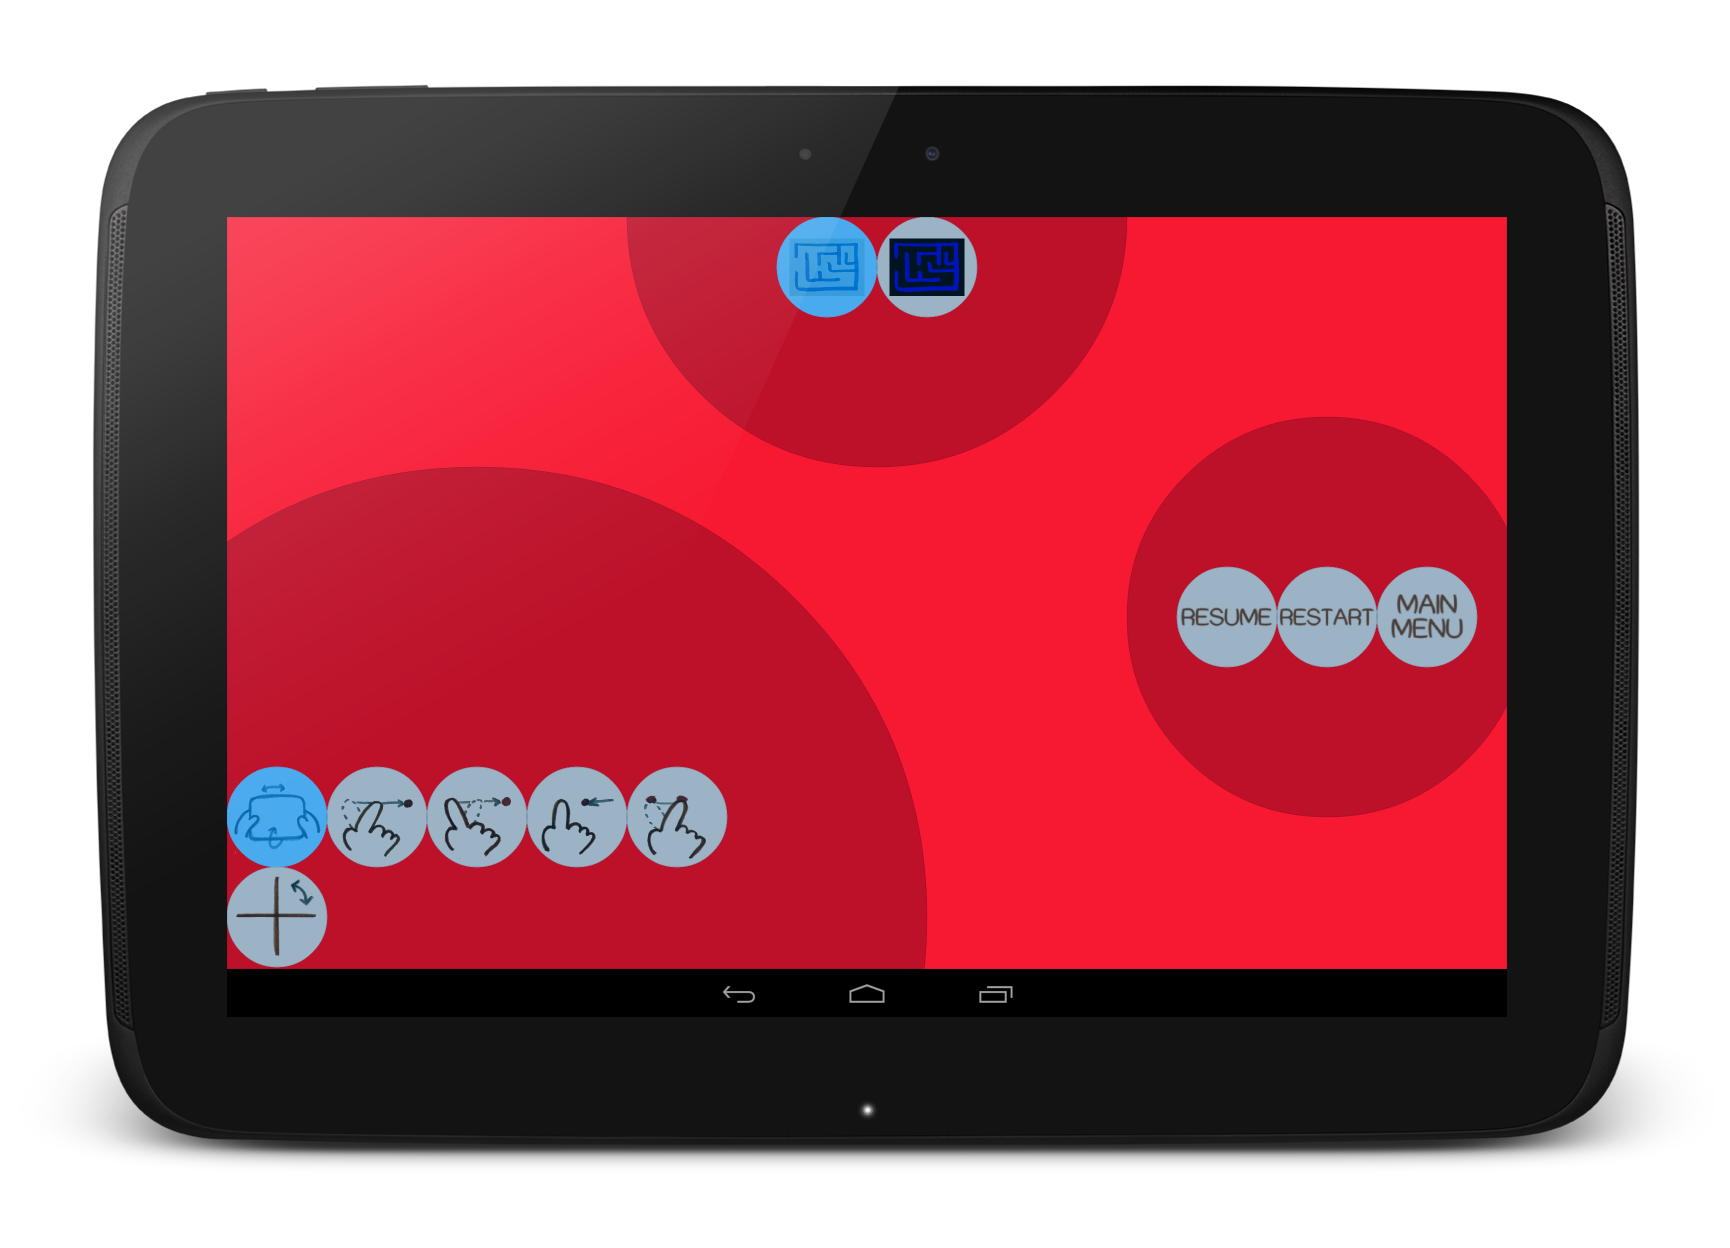
This menu allows us to change both the type of visualization and the kind of interaction of the game we are currently playing. Note that these changes are not saved in the game, that is, we do not change the saved game by using this menu.
Type of visualization
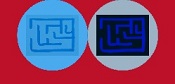
- Original picture. By selecting this option, the original picture is displayed as the game scenario.
- Control picture. By using this option, the picture/scenario is displayed as recognized by Inventame.
Type of interaction

- Tilt. Tilt the device so that the interactive objects fall as if gravity would affect it.
- Push. Tap, hold and pull forward to throw the object.
- Slingshot. Tap, hold and pull back to slingshot the object.
- Follow the finger. Tap an object and then move your finger or tap anywhere else on the screen. As a result, the ball starts moving towards the finger location.
- Direct location. Tap the object, hold and directly slide your finger on the screen towards the location where you want to locate the object. This option is especially useful when, in the middle of a game, you want to change the location of one or several interactive objects.
- Invert axis. This option is only applicable to the “tilt” kind of interaction. By inverting axis, tilting the device horizontally produces a vertical movement of the interactive objects, while tilting the device vertically produces a horizontal movement of the objects. These movements are counterintuitive and therefore you can use them to produce trickier game experiences.
Resume. Go back to the play screen and continue playing the game where it was paused.
Restart. Go back to the play screen and restart (from the beginning) the game we were playing.
Main menu. Go to the main menu screen.
In addition, you can go back to the play screen by pressing the standard Android back button.